Creating an Apple-Style 'Spinner'
Originally published on my old QuintusQuill Console blog in December 2008.
With AJAX everywhere now, there are many progress indicators available for download on the Web. My favourite type are 'spinners' (also called 'throbbers')—partly because these are what Apple uses for their 'indeterminate' progress indicators in Mac OS X. Unfortunately, to me, none of the spinners available on the Web are as good as those that I see every day in Mac OS X. So when eventually I wanted a spinner to keep my users happy while I made an AJAX request, I decided to make one myself. I wasn't sure how to go about this, and couldn't find many tutorials on the subject. Weeks passed, and I still had made no progress on the spinner. Eventually, I stumbled across this tutorial that described how to make a circle-style progress indicator. Using the same techniques, I was able to finally create my spinner!
Afterwards, I thought that I'd write the missing tutorial. Here it is.
Before we begin
In this tutorial, I am going to show you how to create a spinner that is intended to be displayed on a white background. You should then be able to adapt these techniques (they basically stay the same—just the colours change) to create spinners optimised for other backgrounds.
Part One: Creating the Spinner
Setting up the Document
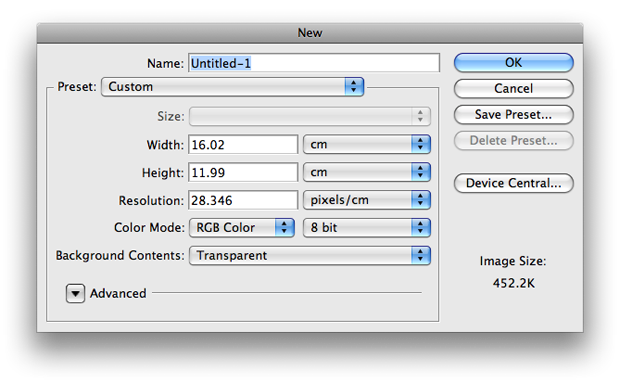
The first step is to create a new document in Photoshop. I chose Photoshop's default size, but changed "Background Contents" to "Transparent".
Create a new layer, and fill it with white using the Paint Bucket Tool. Name it "White Background", or something else descriptive. Turn on snapping () and gridlines (). Finally, zoom in to around 1200 percent so that you can see the faintest squares. Throughout this tutorial I shall call a "square" one of these faint squares.
Drawing the Spinner
The first step in creating the spinner is to draw one of the capsules.
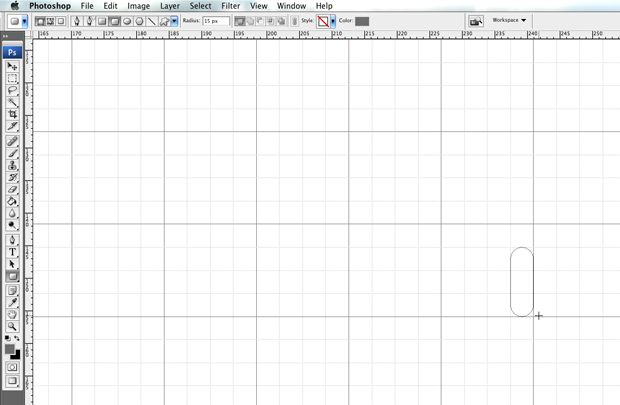
Change to the Rounded-Rectangle tool, and set the radius to "15px". It doesn't matter what the colour is, as we'll change it later (I set the colour to 50% black, or #808080). Now draw a rectangle three squares high and one square wide.
There are 12 capsules in Apple's spinner. To create the spinner, we need to duplicate our capsule 12 times at angles of 30º (Radius of Circle ÷ Number of Capsules = 360 ÷ 12 = 30). First, however, we can halve the number of copies we need to make...
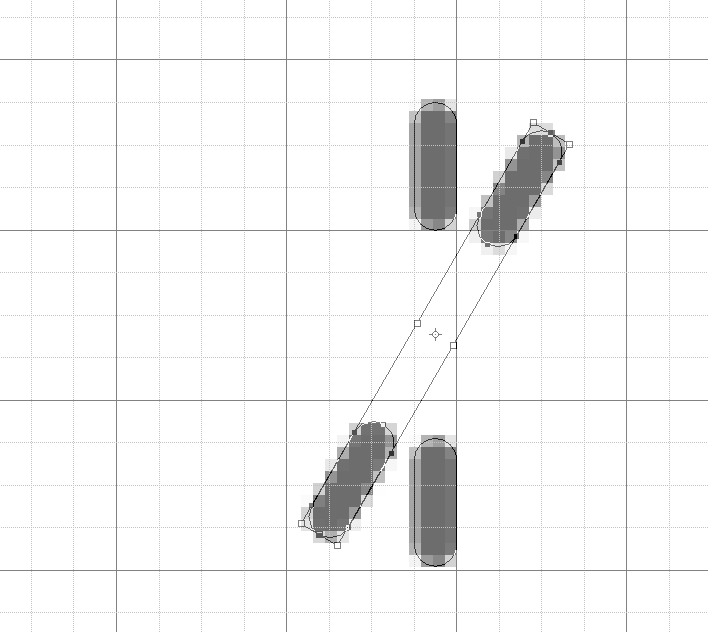
Change to the Path Selection Tool, and, holding down the option key (this duplicates the shape), drag it down nine squares (as shown below).
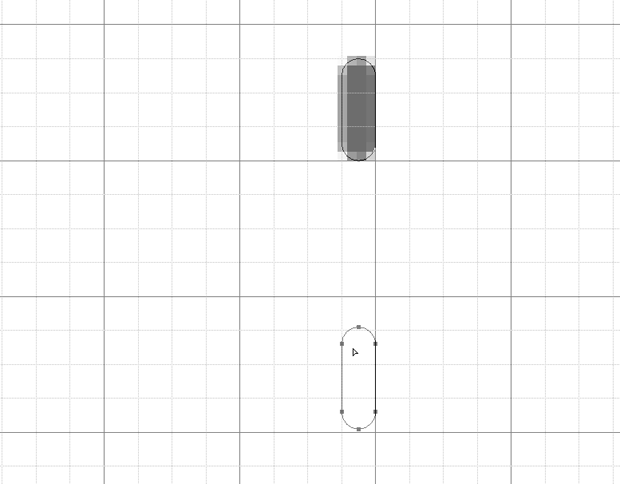
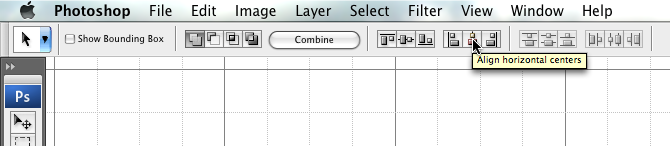
Make sure that the new capsule is in line with the original. Since we're using gridlines and snapping, it should be perfectly in line. If in doubt, select both shapes and click the "Align Horizontal Centers" button in the toolbar (screenshot).
Now we only have to duplicate this pair of capsules 6 times. Make sure that the two shapes are selected, and then repeat the following steps 6 times:
- Copy (Command-C)
- Paste (Command-V)
- Transform (Command-T) (screenshot), and enter "30" in the rotation text field (screenshot)
- Press Return two times (the first to leave the rotation field, the second to leave Transform mode)

You should end up with a spinner looking like this:
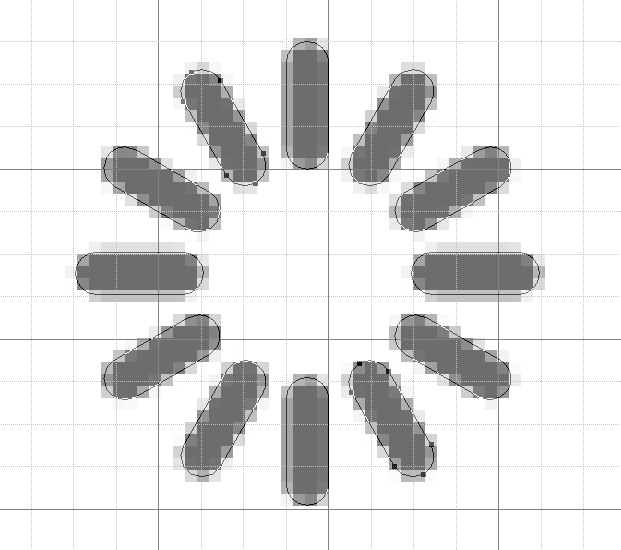
At this point, you can turn off the gridlines. Also, it might be helpful to rename the shape layer to something more meaningful than "Shape 1"... (I named it "Progress Indicator".)
Filling the Spinner
Now we need to make some of the capsules fade. For this, we shall use an Angle gradient.
Reset the Foreground and Background colours (D) and switch them around so that the foreground colour is white (X).
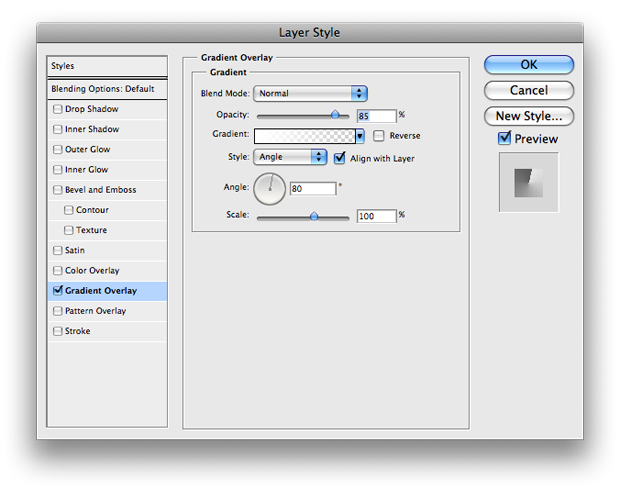
Double-click on the shape layer to bring up the Layer Styles window. Select "Gradient Overlay" from the list on the left side of the window (make sure that you click the text, not the checkbox). This should enable the gradient overlay and bring up its settings (if you had clicked the checkbox, the gradient overlay would have been enabled, but its settings wouldn't have been displayed).
Set the gradient to "Foreground to Transparent". The resulting gradient should go from white to transparent, since we set the foreground colour to white.
Set the style to "Angle", and then adjust the angle of the gradient until the top capsule is completely un-obscured.
Set the opacity to 85%, as the gradient overlay is a bit extreme (we want all of the capsules visible—currently some of them are completely invisible).
Fine-tuning the Spinner
Now we need to adjust the colour of the spinner. We can do this by double-clicking on the grey box on the left-most side of the shape layer:
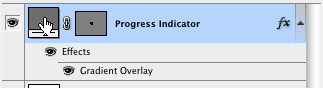
I find that 35% black (#585858) works well.
You might want to trim down the document so that there isn't any wasted space around the spinner. Hide the layer containing the white background, and choose . In the resulting box, make sure that "Based on" is set to "Transparent Pixels" and that in "Trim Away", "Top", "Bottom", "Left", and "Right" are all checked.
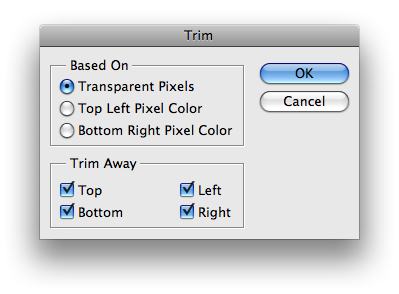
When you've finished the trim command, you can re-enable the white background layer.
We've finished part one!
Here's a picture of our spinner:

Part 2: Animating the Spinner
Animating the spinner is a little more time-consuming. You could just rotate a static image of the completed spinner 30 degrees for each frame. However, this would require that the rotation centre was exactly at the centre of the spinner—a little off, and the animation would look very bad. In this tutorial, we'll use a method that is slightly more time-consuming, but ensures good results: we shall change the angle of the gradient overlay for each frame.
If you're going to create an animated GIF, open the Animation palette (). The way the animation palette works is a little confusing at first. You might imagine that when you create a new frame, you create a snapshot of your document at the time the frame is created. What actually happens is that the selected frame mirrors the current document.
Repeat the following steps until you arrive back at the beginning (when you get to the end, don't repeat the first frame):
- Select both layers (the white background layer and the spinner shape layer), and press Command-Option-E (create a new layer from merged layers).
- (This step is only required if you're creating an animated GIF - but take the extra time and then you have the option later) Create a new frame (by clicking the icon on the left of the Delete icon, whose tip says "Duplicates Selected Frames"), and hide the newly-created layer.
- Open the Gradient Overlay settings by double clicking on the "Gradient Overlay" effect as shown:
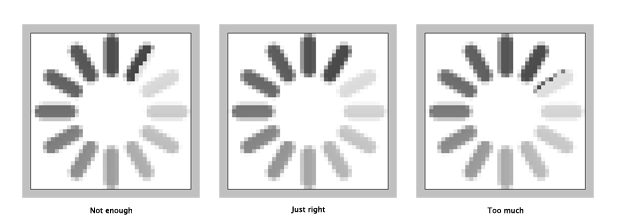
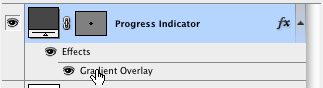 Adjust the angle of the gradient clockwise until the next capsule is evenly 'filled' with dark grey.
(This only applies if you have created animation frames as you went along) When you have finished, play the animation. Currently, it's a bit too fast (for my taste), so we will change the timing of the animation. Select all of the frames, and on any one, click on the text that says "0 sec." (or something similar). A popup menu will appear, allowing you to change the duration of the selected frame(s). I find that all the presets are too slow for my taste, but thankfully we can select "Other..." and choose our own duration. I find that a duration of 0.05 to 0.06 seconds looks nice.
The End
At this point, you have created all the layers/frames you need for an animation. Now you can do whatever you want with it, such as exporting it as an animated GIF, or putting all of the frames into a single image... (For more info about the latter, see here, and then look at this article. Tip: it's usually easier to use a single column rather than a grid.)
I hope you have learnt something from this tutorial! If you have any corrections, improvements, or simply enjoyed this tutorial, please leave a comment below. You're also welcome to add this article to your favourite social bookmarking/news site (e.g. Digg, Del.ic.ious)!