Exploring CloudKit JS
Apple’s CloudKit framework offers a secure way to store app data and make it available to all of a user’s Apple devices, tied to their Apple account. I was looking into it recently, and I noticed that they also have the ability to use it on the web. Enter CloudKit JS. You can access CloudKit data on the client-side using a client token (covered below), or also directly server-side using a private server token. I found the whole experience quite confusing, so this post will show you all the steps you need to get started with CloudKit on iOS and web in 2024!
I’ve created a GitHub repository with two examples of a simple task list app that connects to CloudKit to read / write tasks:
- Vanilla HTML + JavaScript page
- Modern Next.js app using React, TypeScript, Tailwind CSS, & shadcn
GitHub - steveharrison/cloudkitjs-examples
Contribute to steveharrison/cloudkitjs-examples development by creating an account on GitHub.
I recommend you check out this repo as I’ll reference it later.
iOS
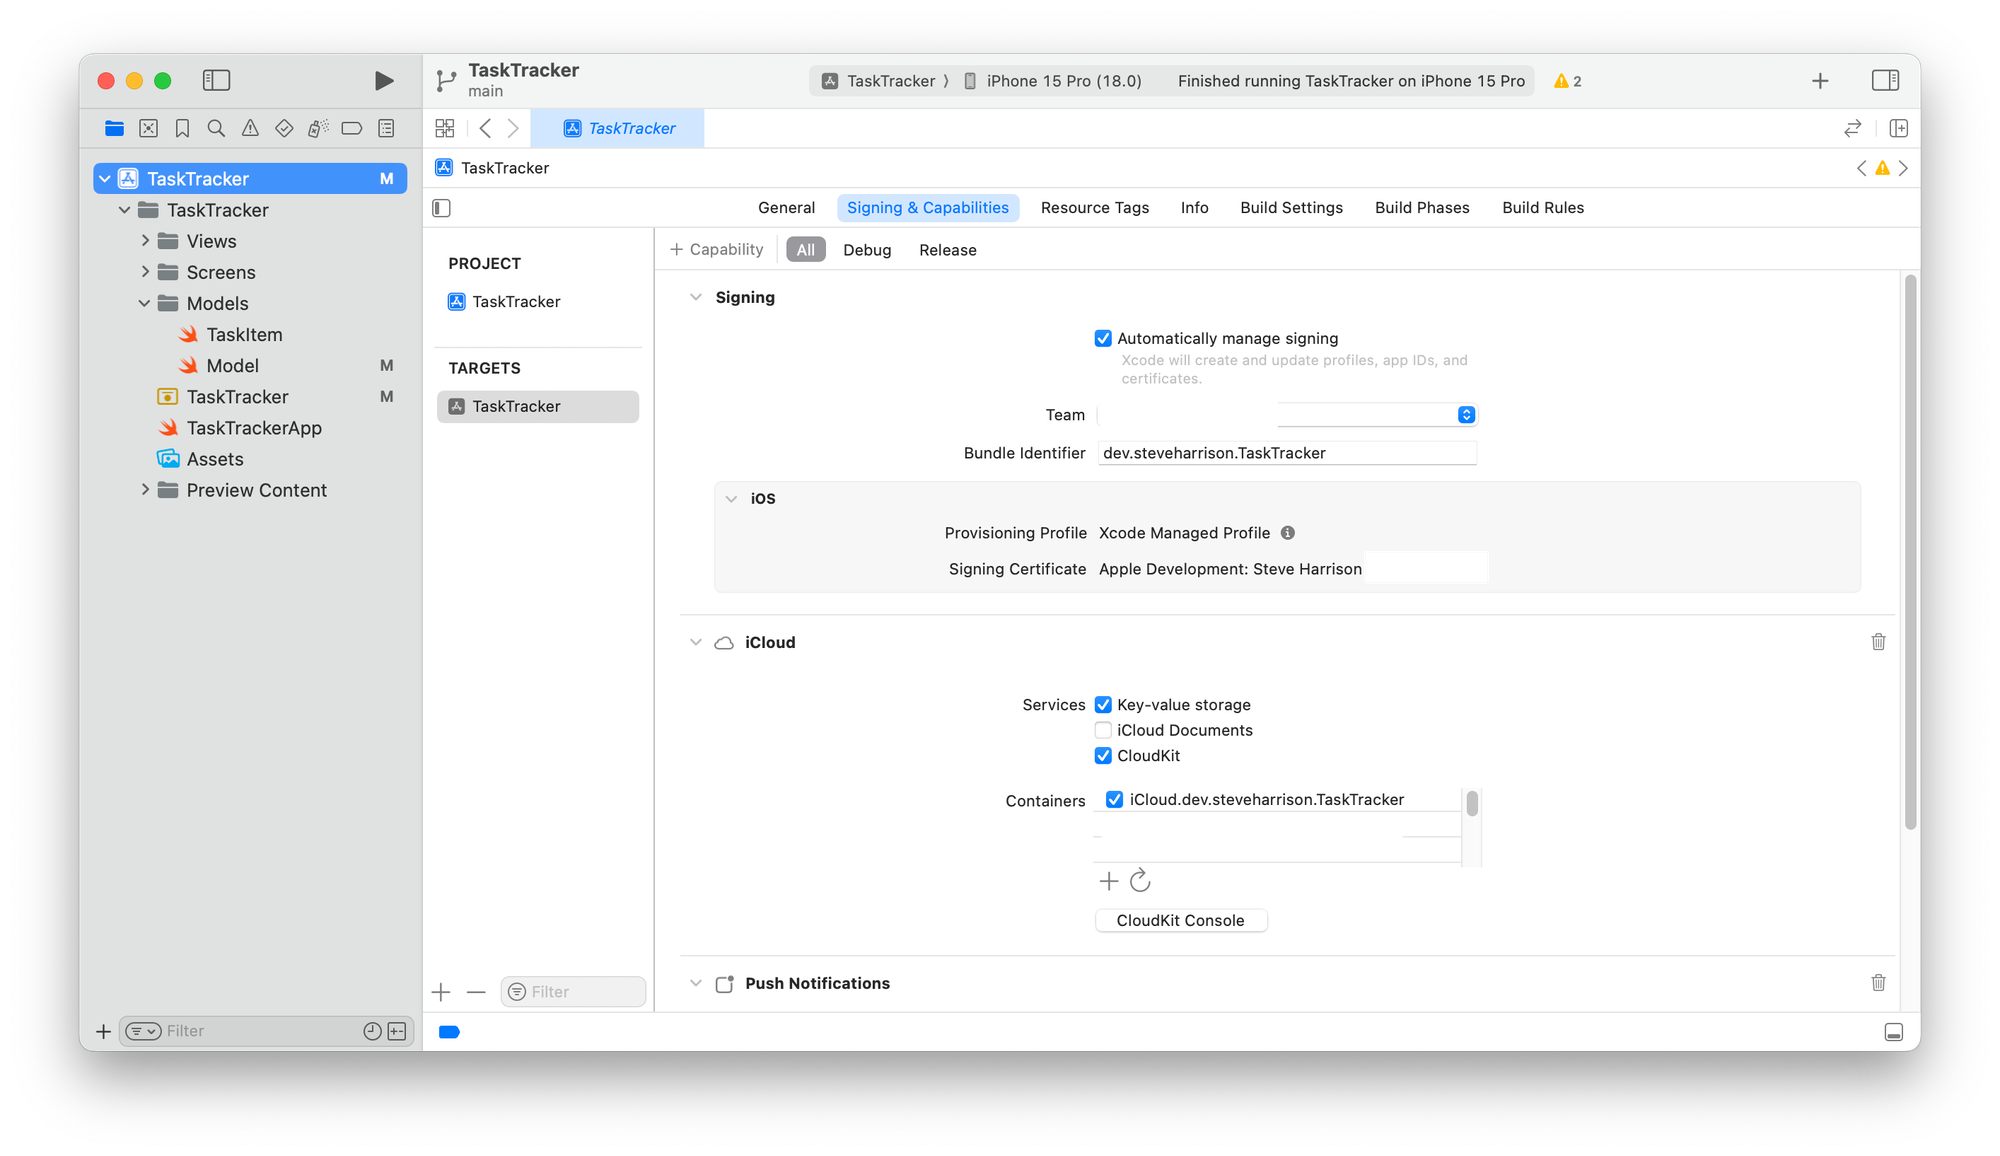
Firstly, to use CloudKit, you need to have a paid Apple developer account. Start by downloading an example CloudKit iOS app (you can create the app yourself following this YouTube tutorial, which I found very helpful) and open it in Xcode. Before you run it, you need to modify the following under Targets > TaskTracker > Signing & Capabilities:
- Select your own Team.
- Edit Bundle Identifier to your own custom bundle identifier.
- Uncheck the existing container under Containers.
- Under Containers, click the plus button and enter your bundle identifier. It will add “iCloud.” to the beginning once created, but this mustbe the same as your bundle identifier. (I didn’t realise this initially.)
- Wait 5 min or so. It takes some time for iCloud to create the container, and even once it goes from red to black when you click the refresh icon to the right of the plus, it may not be fully initialised yet.
While not required, I also recommend modifying the addTask function in Models > Model.swift to the following code that doesn’t swallow errors and logs what’s happening in case something fails:
func addTask(taskItem: TaskItem) async {    debugPrint("addTask called with taskItem.record", taskItem.record)
    do {        let record = try await db.save(taskItem.record)        guard let task = TaskItem(record: record) else { return }        tasksDictionary[task.recordId!] = task        debugPrint("saved record is ", record);    } catch {        debugPrint("Error saving record: \(error.localizedDescription)")    }}
Now you should be able to run the project in Simulator. Once the iOS app appears, click the home button in the top of the simulator, go to the Settings app, and sign in to your iCloud account just like you would on your phone. Once signed in, return to the app, add a new task in the input, press Return, and you should see it appear in the task list.
Next, let’s see the data in the CloudKit Dashboard:
- Navigate to https://icloud.developer.apple.com/dashboard/database.
- If you have multiple accounts, select the account you used in Xcode.
- Switch to the container you created in Xcode in the top left menu.
- Select Schema > Indexes and add an index as follows:
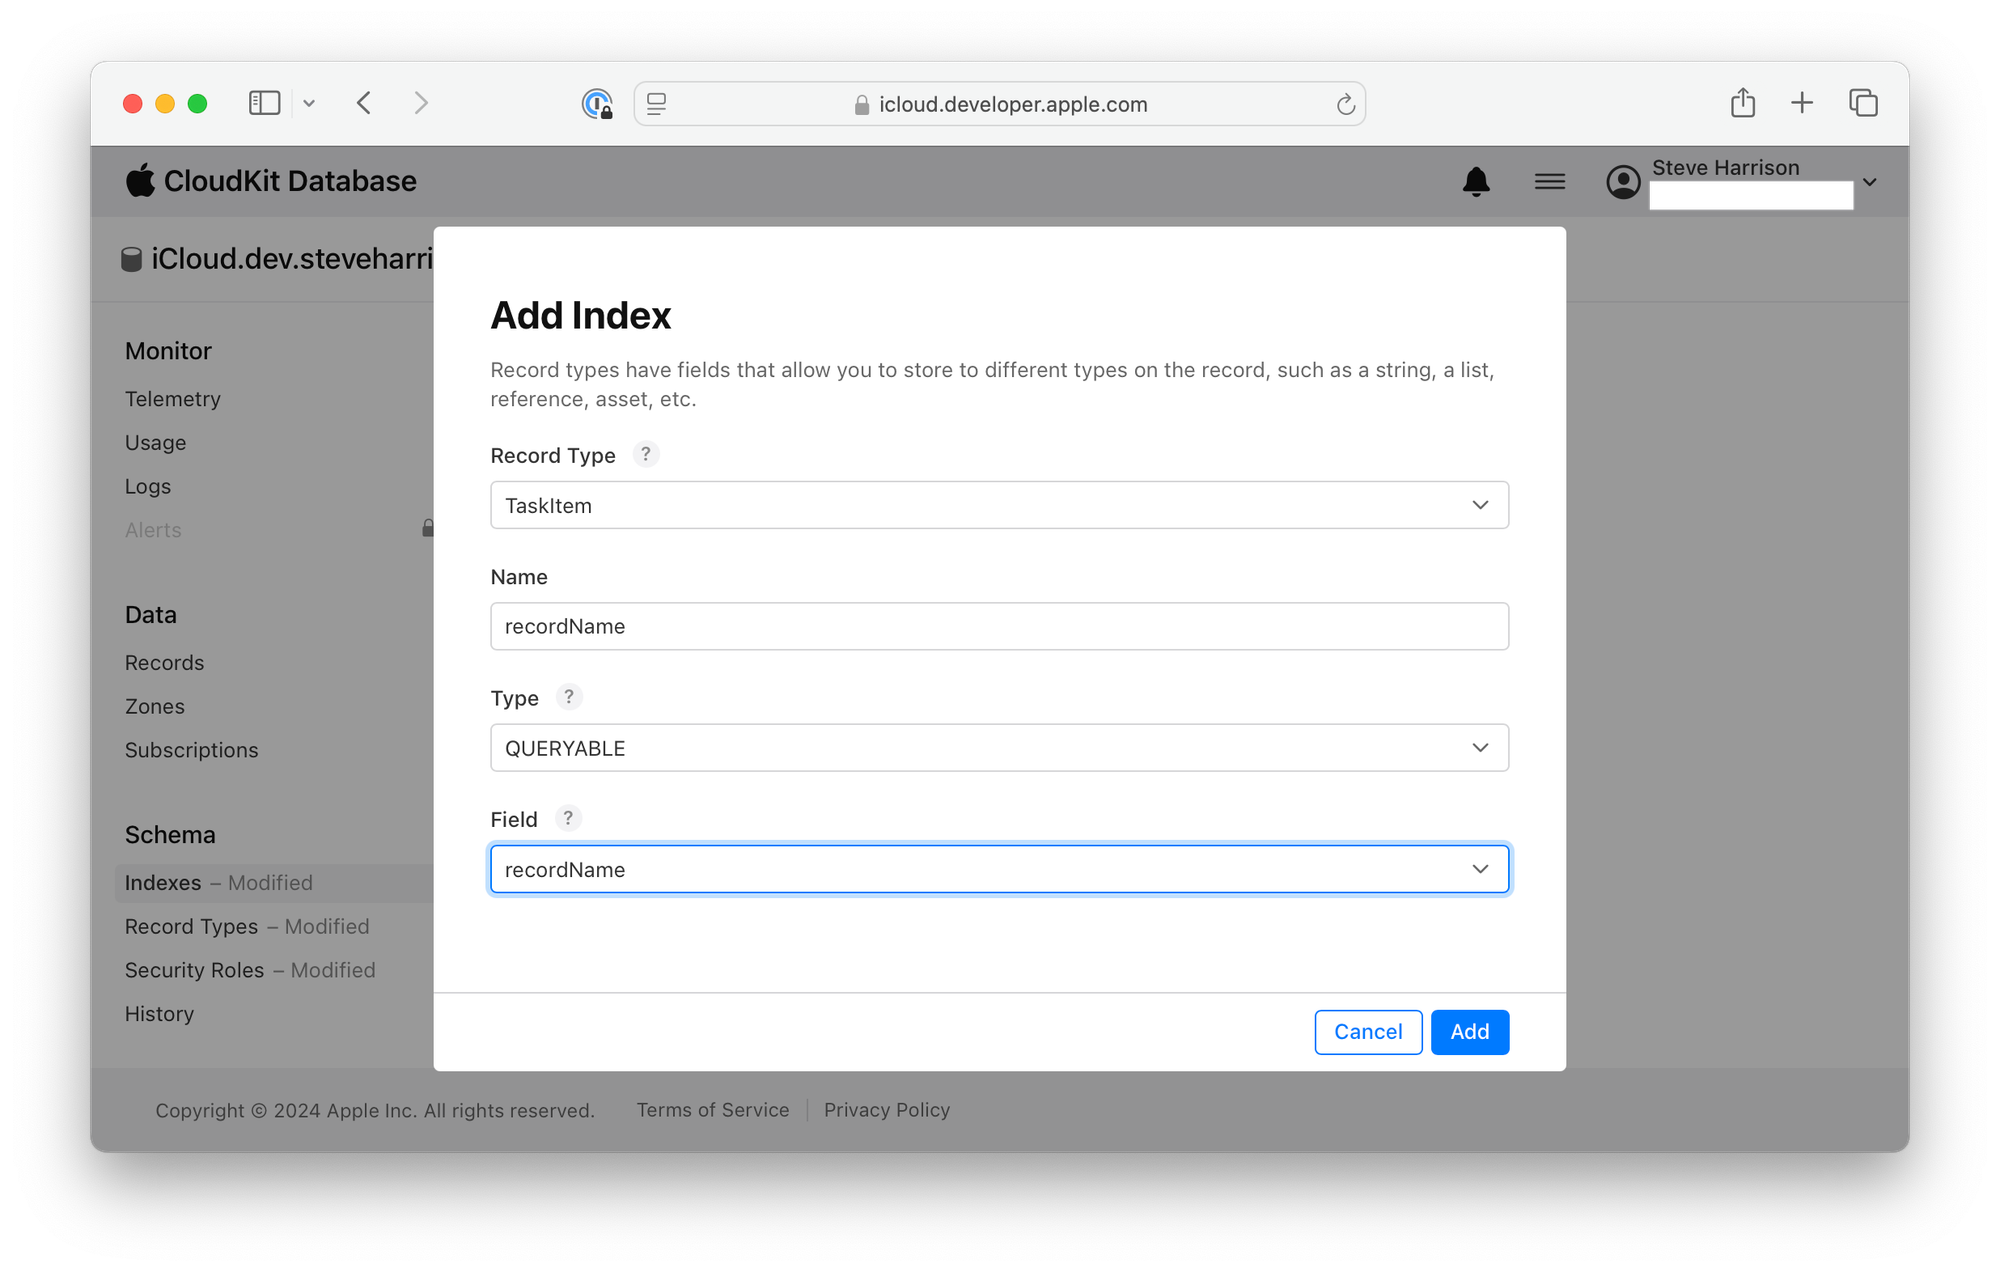
This is a critical step that you have to do for every CloudKit database if you want to be able to view the records in the dashboard. (Another gotcha that I missed trying to get the example working before watching the full tutorial video.)
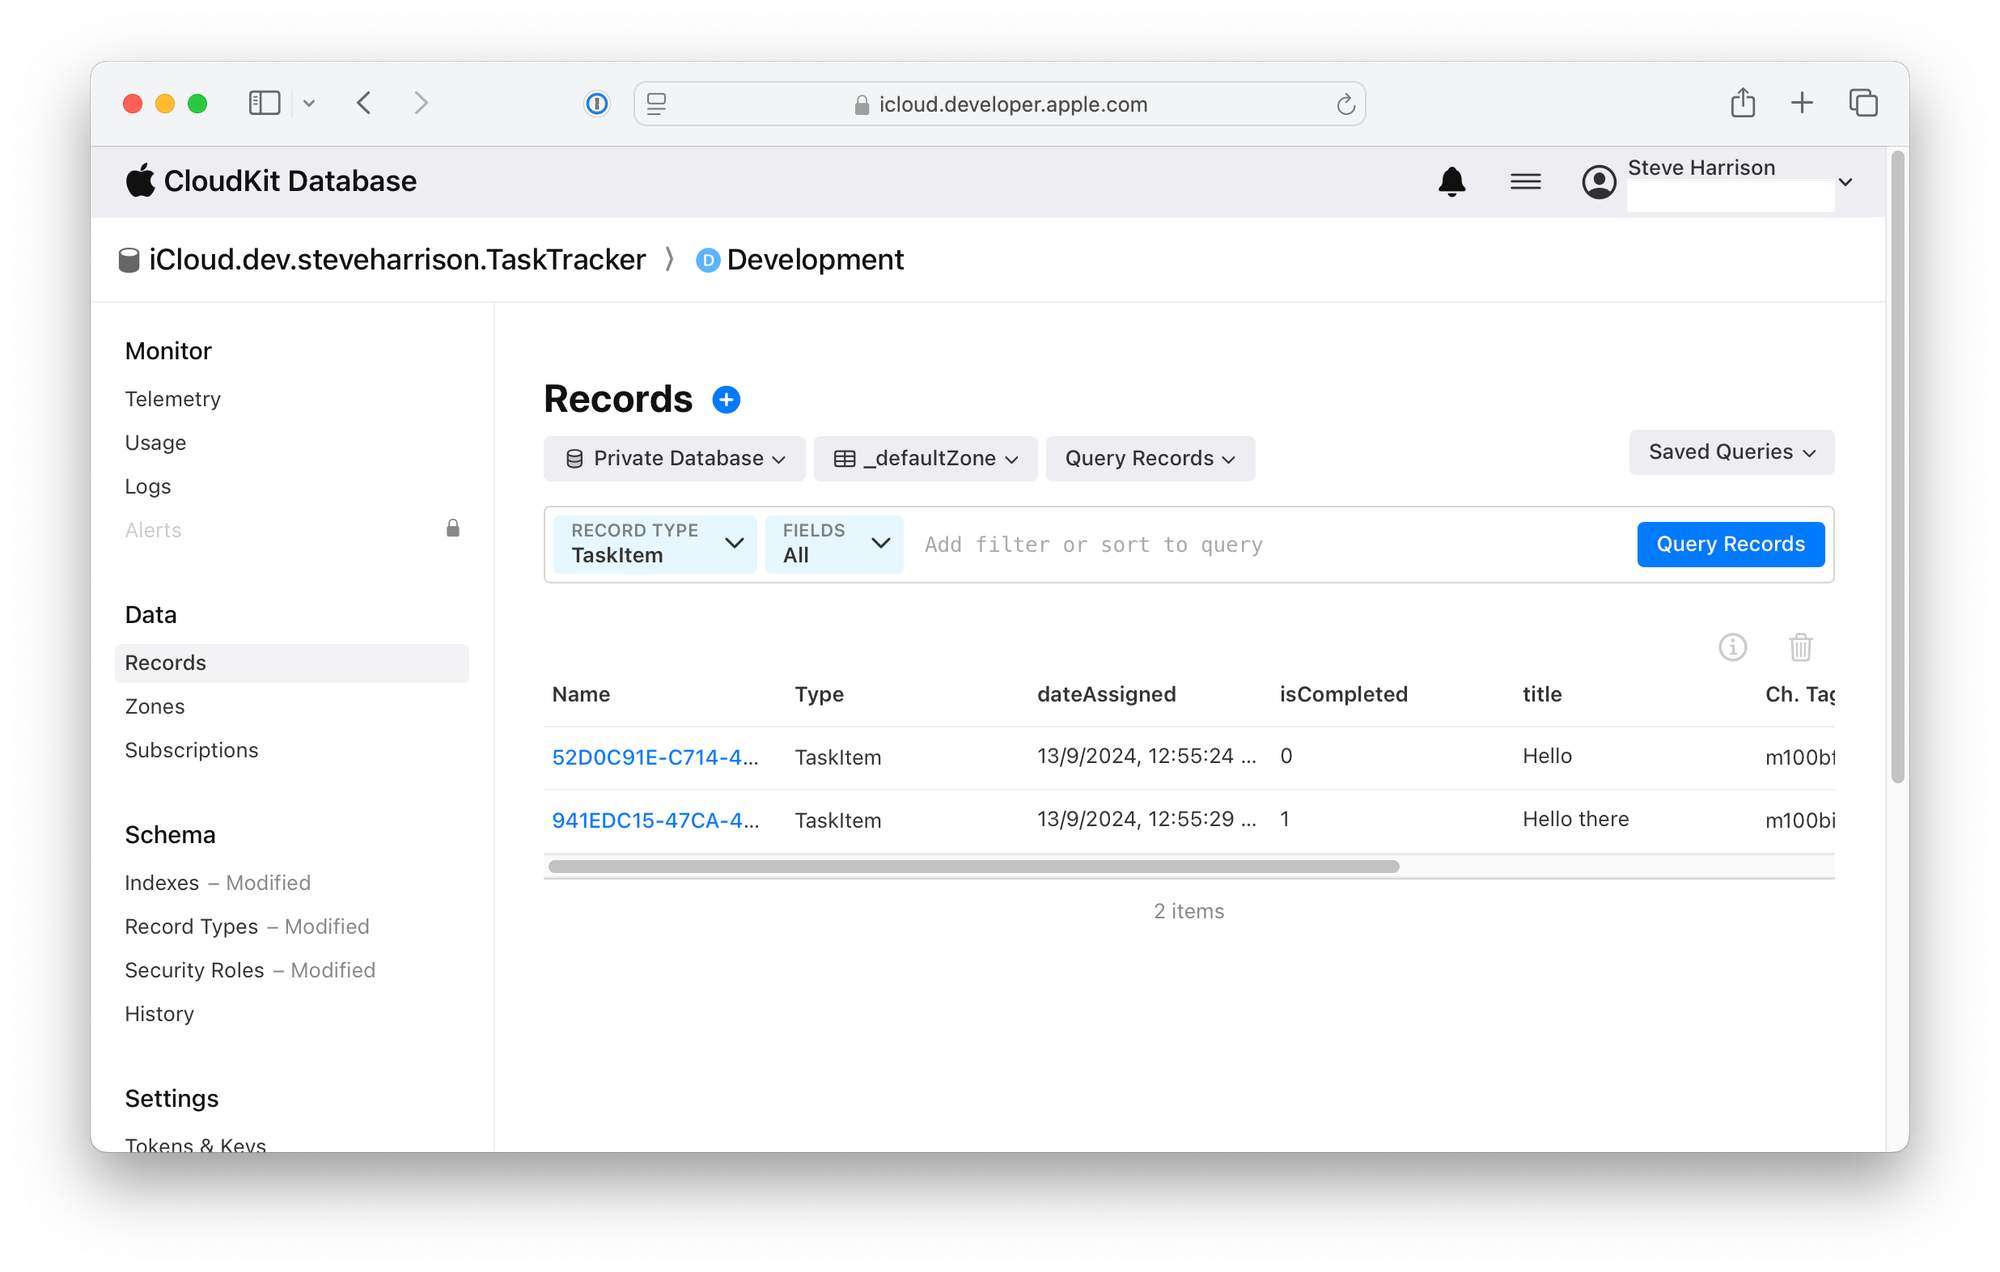
Now you can go into Data > Records, select Private Database, select TaskItem as the Record Type, and click Query Records. You should now see the tasks you created in the iOS app displayed in the table below:
Great! Now we have CloudKit working on iOS, let’s get it working on a webpage.
Vanilla HTML + JS
Go to the CloudKit Dashboard > Settings > Tokens & Keys and click New API Token.
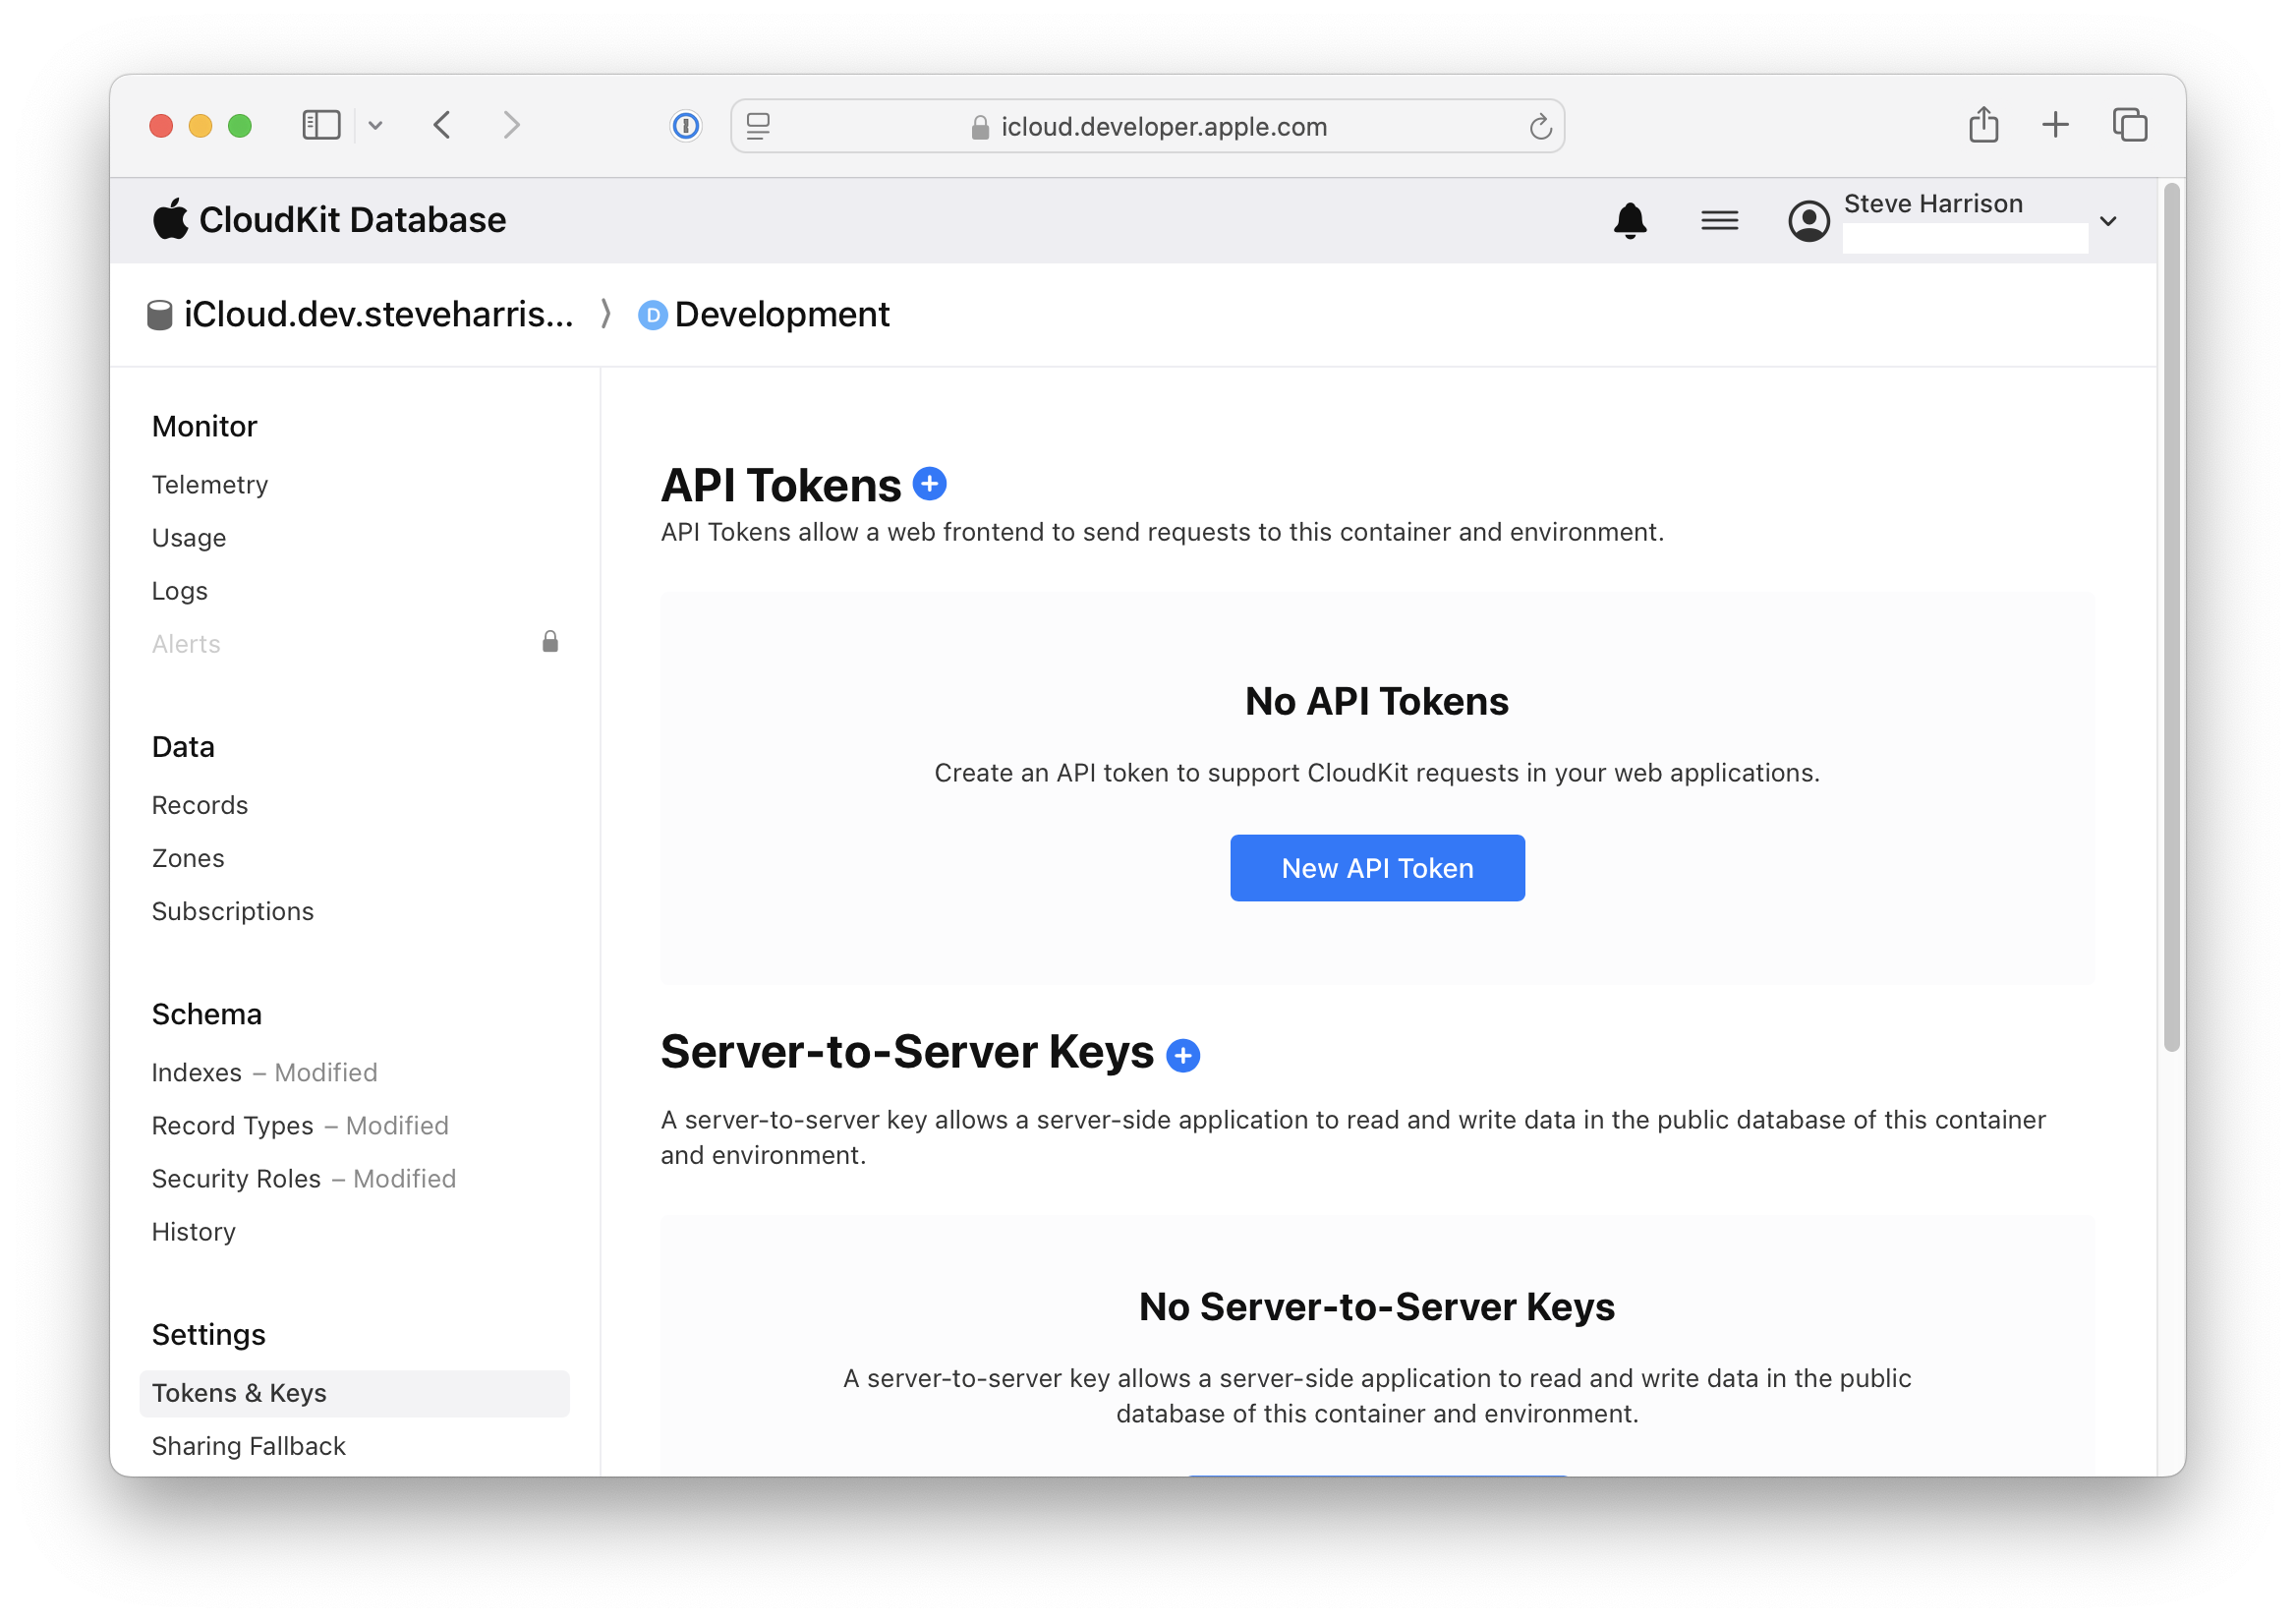
Enter a name for the key and use the default settings:
![]()
Copy the API key value to the clipboard.
Make sure you’ve cloned the cloudkitjs-examples repo and then open vanilla.html in your favourite code editor. Replace the apiKey value with the one you just generated. Change containerIdentifier to your container ID.
Now cd into the cloudkitjs-examples directory and run npx serve . Navigate to http://localhost:3000/vanilla.html in the browser (or whatever port you see in the Terminal output from npx serve). You need to run a local server rather than using file:// as CloudKit JS will set cookies.
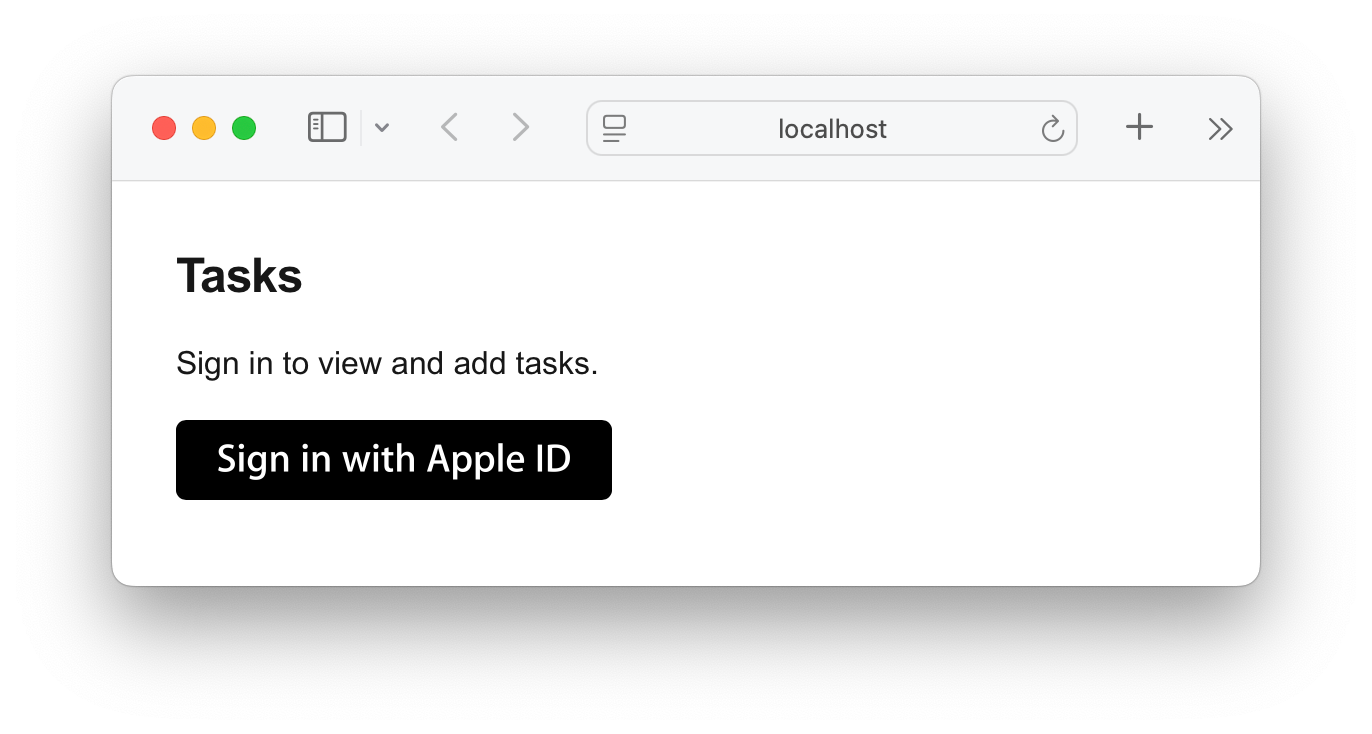
You should see a “Sign in with Apple” button: click it and follow the steps to sign in with your Apple ID (it should be the same ID you signed into the iOS Simulator with). Then you should see something similar to the following (you may have to refresh the page after signing in):
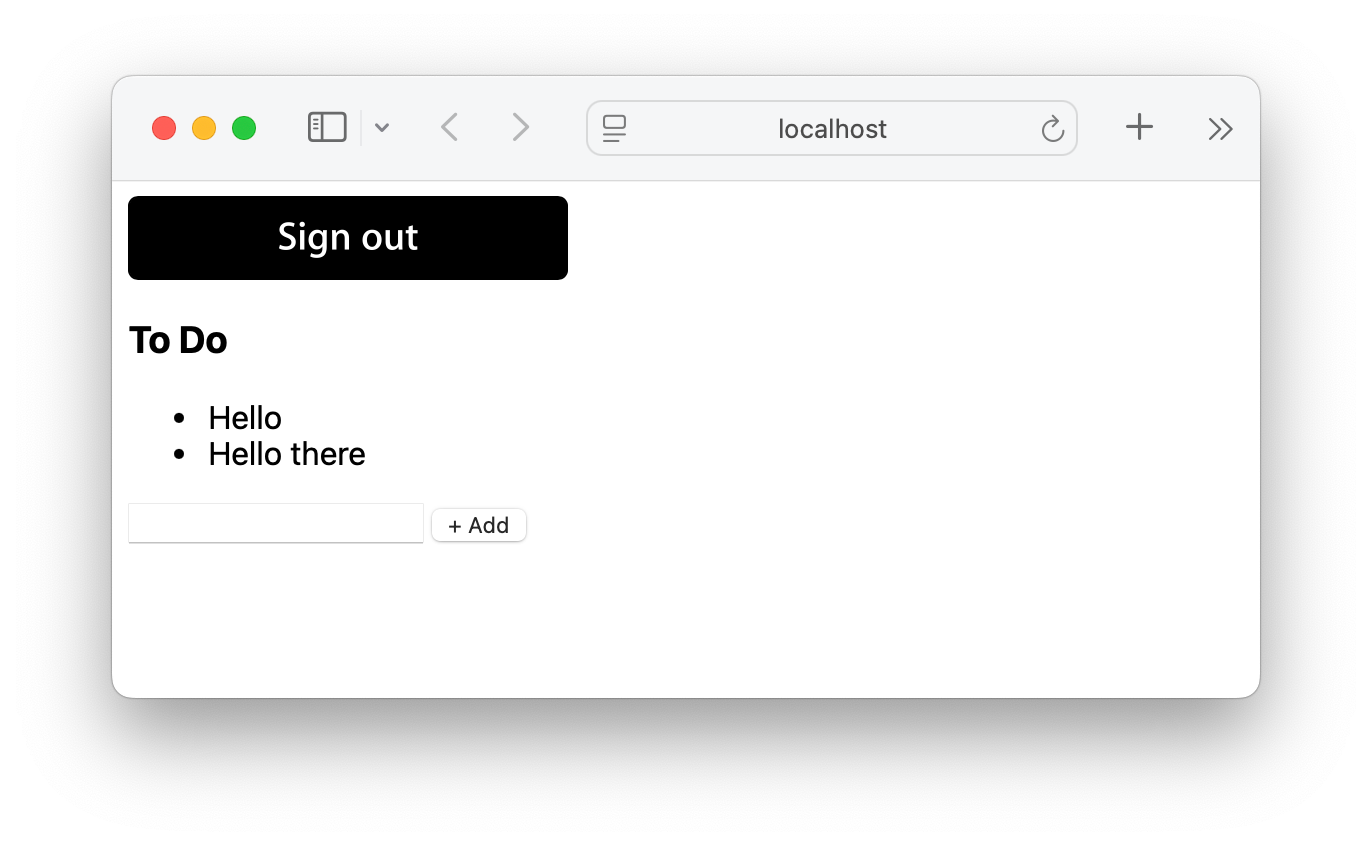
If you type something into the text field and click Add, it will create a new record in CloudKit that you should be able to see in the dashboard and the iOS app. If you add new records there and refresh the web app, you should see the updates.
The JS code in vanilla.html is a lot simpler than the example Apple code at https://cdn.apple-cloudkit.com/cloudkit-catalog. I initially tried copying and pasting code from here, but they reference non-existent functions and specify all sorts of optional arguments, which is not a great starting point when you want to see the simplest way to use it. I used a combination of ChatGPT and manually going through the example code to figure out what the bare minimum is.
Next.js app
While the vanilla example should be enough to see how to use CloudKit JS on the web, this is a very contrived example and most modern web apps will be built using a bundler and frameworks like Next.js, which is why I developed an example for this too.
Open the nextjs-cloudkit folder in your favourite code editor. Edit store.ts with your API key and container ID, then start the project in Terminal:
cd nextjs-cloudkitnpm inpm run devYou should see the following screen:
Sign in and then you should see the following (refresh if tasks aren’t showing):
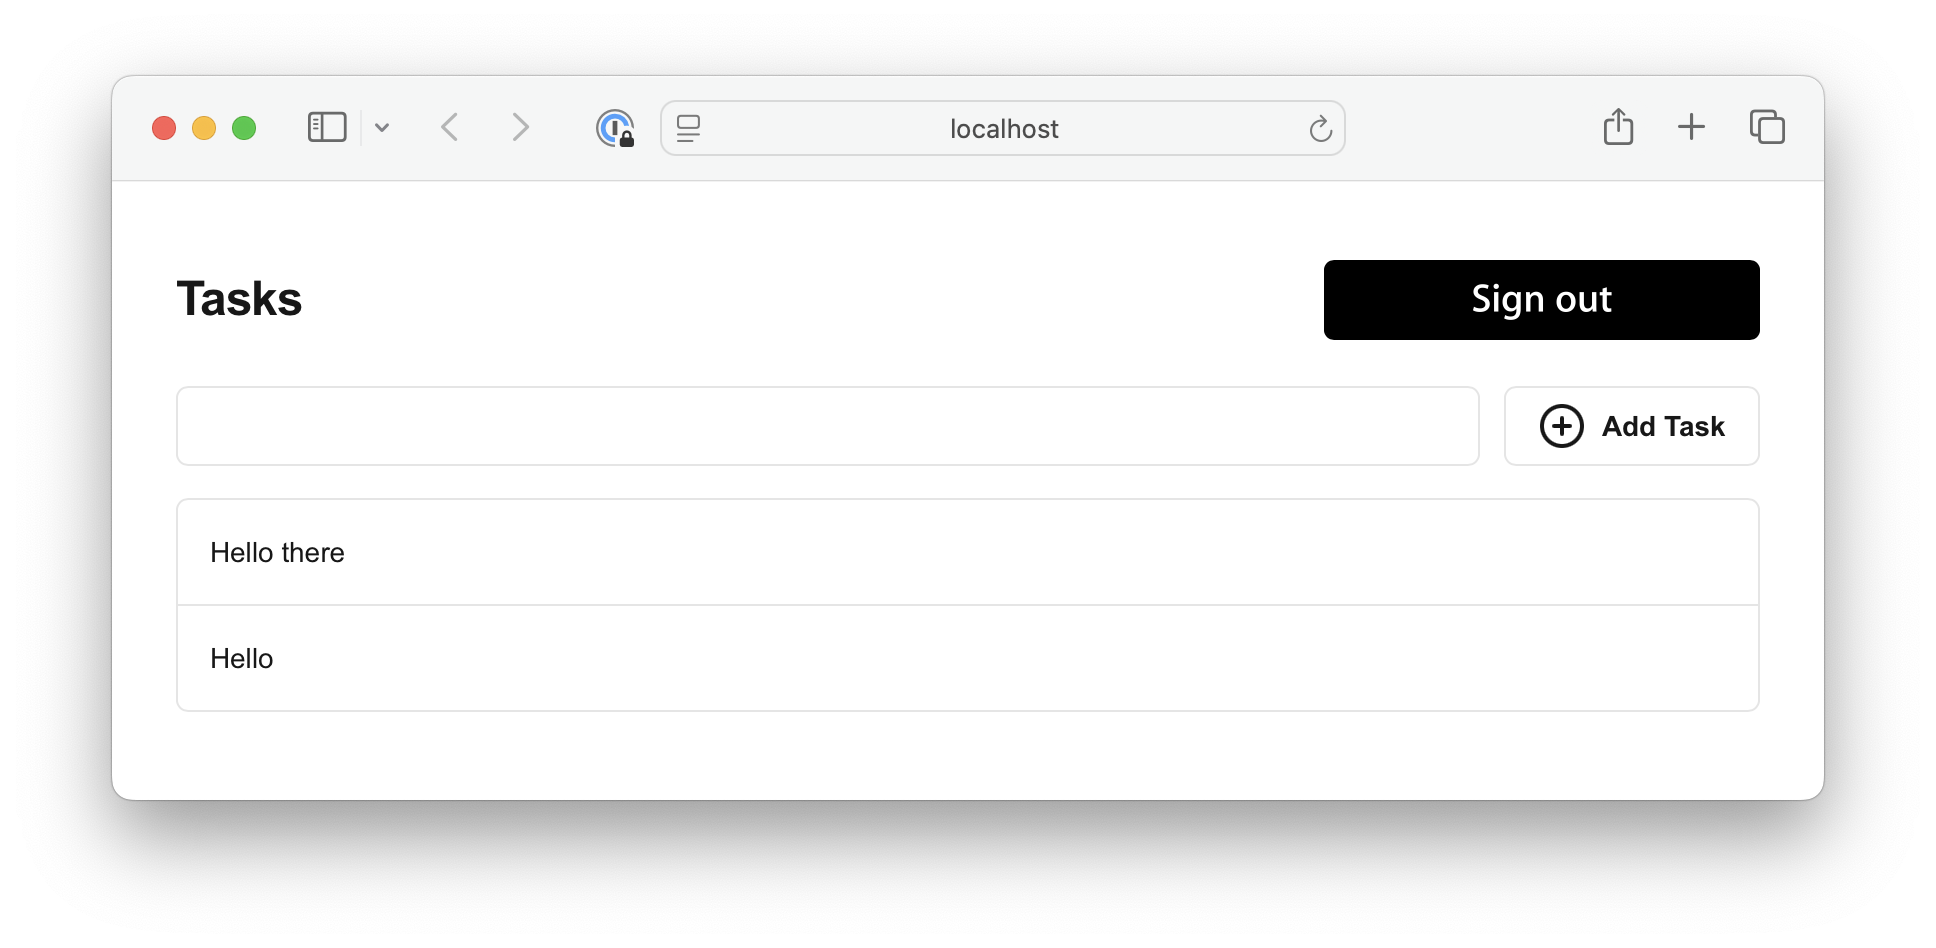
You should be able to add a new task and see it at the top of the list. If you look at the code, you can see that Apple’s CloudKit JS was designed before Promises and async/await, but that doesn’t mean we can’t wrap their methods in Promises ourselves and await these wrapper functions, which is what I’ve done in store.ts. Apple also recommends you host the CloudKit JS through their CDN, but we typically bundle JS libraries these days to avoid race conditions (you’ll notice we had to use a window.addEventListener('cloudkitloaded') in the vanilla JS version) and dependencies breaking, so I’ve used a TypeScript wrapper called tsl-apple-cloudkit, which also gives types for most of the library.
These examples only cover some of the possibilities in CloudKit JS—we haven’t covered updating tasks (e.g. changing the isCompleted field), deleting them, listening for new changes, etc. However, you should be able to use these functions in a similar way to the core reading/writing/auth functions that I’ve covered here.
I hope this helps, and let me know if you have any issues / improvements to suggest. 🙂